Approve Leave Guide
Overview
This guide explains how managers and administrators can review, approve, and reject leave requests in the system. You can view all pending leave requests, filter them based on various criteria, and take appropriate actions.
Prerequisites
- You must have manager or administrator access permissions
- Employees must have submitted leave requests for you to review
Getting Started
Accessing the Approve Leave Section
- Log into your account
- Navigate to the Leave Management section
- Click on "Approvals"
Viewing Leave Requests
Understanding the Interface
The approve leave interface provides two viewing options:
Card View - Displays leave requests as individual cards - Shows key information in an easy-to-read format - Best for reviewing fewer requests in detail
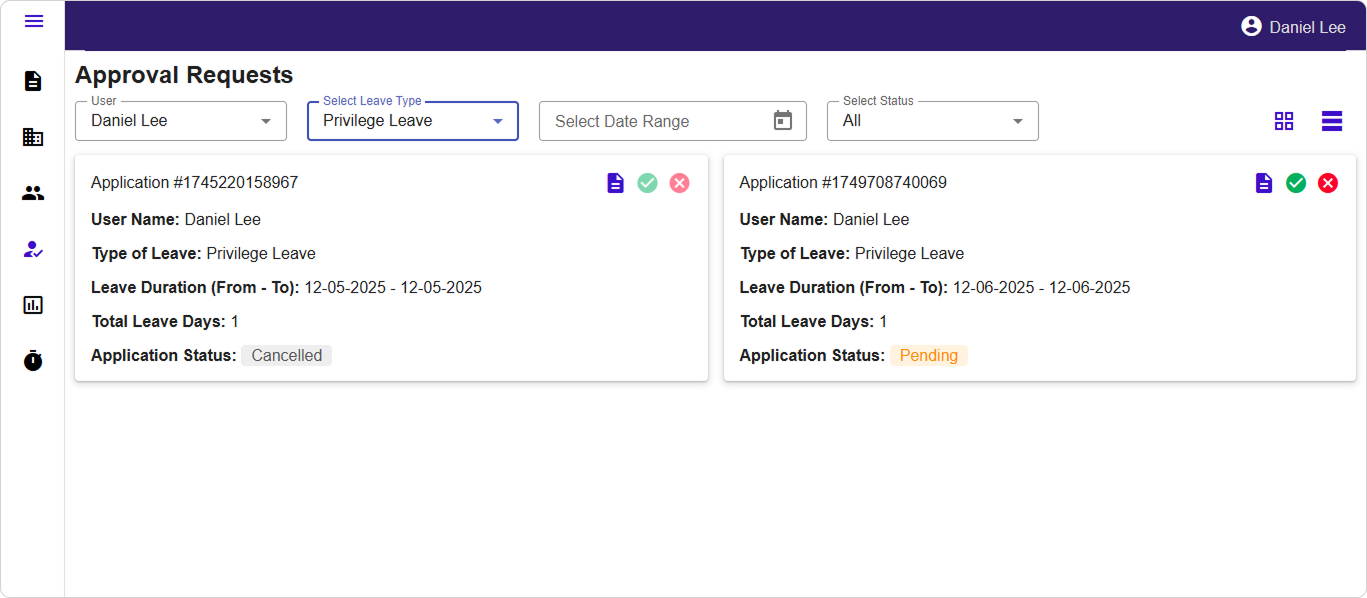
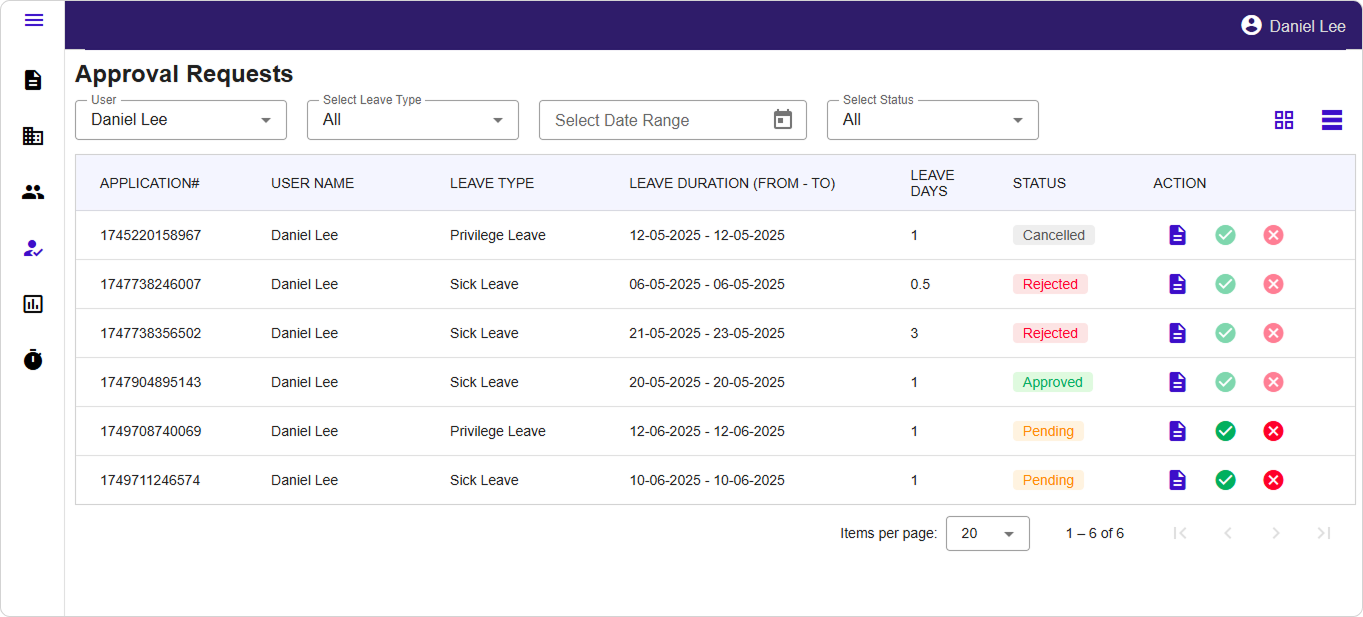
Table View - Displays leave requests in a structured table format - Shows more requests at once - Includes pagination for large numbers of requests - Best for processing multiple requests quickly
Switching Between Views
- Click the view toggle button (card/table icon) in the top-right corner
- Your preference will be remembered for future sessions
Information Displayed
Each leave request shows:
- Application Number: Unique identifier for tracking
- Employee Name: Who submitted the request
- Leave Type: Annual leave, sick leave, etc.
- Duration: Start date and end date
- Total Days: Number of leave days requested
- Status: Current approval status
- Supporting Documents: Any attached files (if applicable)
Filtering Leave Requests
Use the filter options at the top of the page to narrow down requests:
Available Filters
-
User Filter
- Click the user dropdown
- Select a specific employee
- View only that employee's requests
-
Leave Type Filter
- Click the leave type dropdown
- Choose specific leave types (annual, sick, personal, etc.)
- Filter to focus on particular request types
-
Date Range Filter
- Click the date picker
- Select start and end dates
- View requests within specific time periods
-
Status Filter
- Click the status dropdown
- Choose from: Pending, Approved, Rejected, Cancelled
- Focus on requests requiring action
Using Multiple Filters
- You can combine multiple filters for precise results
- Filters apply automatically as you make selections
- Clear filters to return to the full list
Approving Leave Requests
Standard Approval Process
- Review the leave request details
- Check the employee's leave balance (if displayed)
- Verify the dates and duration
- Click the green checkmark (Approve) button
- The request status will update to "Approved"
- The employee will be notified automatically
Quick Approval Tips
- Use table view for faster processing of multiple requests
- Check for any scheduling conflicts before approving
- Review supporting documents if attached
Rejecting Leave Requests
Rejection Process
- Locate the leave request to reject
- Click the red X (Reject) button
- A comment dialog will appear
- Enter a clear reason for rejection in the comment field
- Click "Submit" or "Reject" to confirm
- The request status will update to "Rejected"
- The employee will receive the rejection with your comments
Writing Rejection Comments
- Be clear and professional
- Explain the specific reason for rejection
- Provide guidance if possible (e.g., "Please resubmit for different dates")
- Common reasons include:
- Insufficient leave balance
- Operational requirements
- Scheduling conflicts
- Missing documentation
Viewing Request Details
Accessing Detailed Information
- Click the information icon (i) next to any leave request
- A detailed dialog will open showing:
- Complete application information
- Employee details
- Full date breakdown
- Any attached supporting documents
- Request history and comments
Using the Details View
- Review all information before making decisions
- Download or view supporting documents
- Check the request timeline
- Close the dialog when finished
Navigation and Management
Table View Navigation
- Use pagination controls at the bottom
- Change the number of items per page if needed
- Sort columns by clicking column headers
Refreshing Data
- The interface updates automatically after actions
- Refresh your browser if you need to see the latest status
- Filter changes apply immediately
Troubleshooting
Common Issues and Solutions
Can't see any leave requests - Check your user permissions with IT support - Verify you're in the correct approval queue - Clear any active filters
Unable to approve/reject - Ensure the request status is "Pending" - Check your internet connection - Refresh the page and try again
Missing employee in filter - The employee may not report to you - Contact HR to verify reporting relationships - Check if the employee has active requests
Filters not working - Clear all filters and reapply - Refresh the page - Check date format in date picker
Last Updated: September 2024 Version: 1.0 Document Type: End User Guide