User Management in LeaveHub
Overview
The User Management feature in LeaveHub provides administrators with comprehensive tools to manage user accounts, roles, and permissions within the leave tracking system. This guide covers all aspects of user management, from creating new user accounts to managing user profiles and permissions.
Pro Tip
Your available features may vary based on your user role (Global Admin, Leave Approver, or Normal User).
Adding User
Step-by-Step Process
Access User Management
- Log in to Saralflow with administrator credentials
- Navigate to the LeveHub app in the main menu
- Click on "User" from the sidebar menu
- Click on "Add User" button
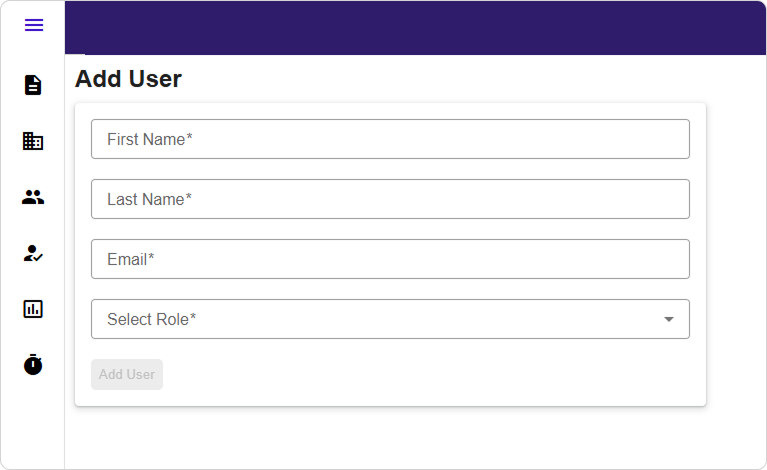
Enter Basic Information
- Fill in the "First Name" & "Last Name" field with the employee's complete name
- Enter a valid email address in the "Email" field
- Choose the user's "Role" as per the organisation
Complete the following required fields:
| Field | Requirements | Example |
|---|---|---|
| First Name* | Letters only, max 50 chars | John |
| Last Name* | Letters only, max 50 chars | Smith |
| Email* | Valid email, max 50 chars | john.smith@company.com |
| Role* | Select from dropdown | User or Leave Approver |
Review and Create Account
- Verify all entered information is accurate
- Review assigned permissions and policies
- Click "Add User" to generate the account
- The system will send an activation email to the new user
Viewing Users
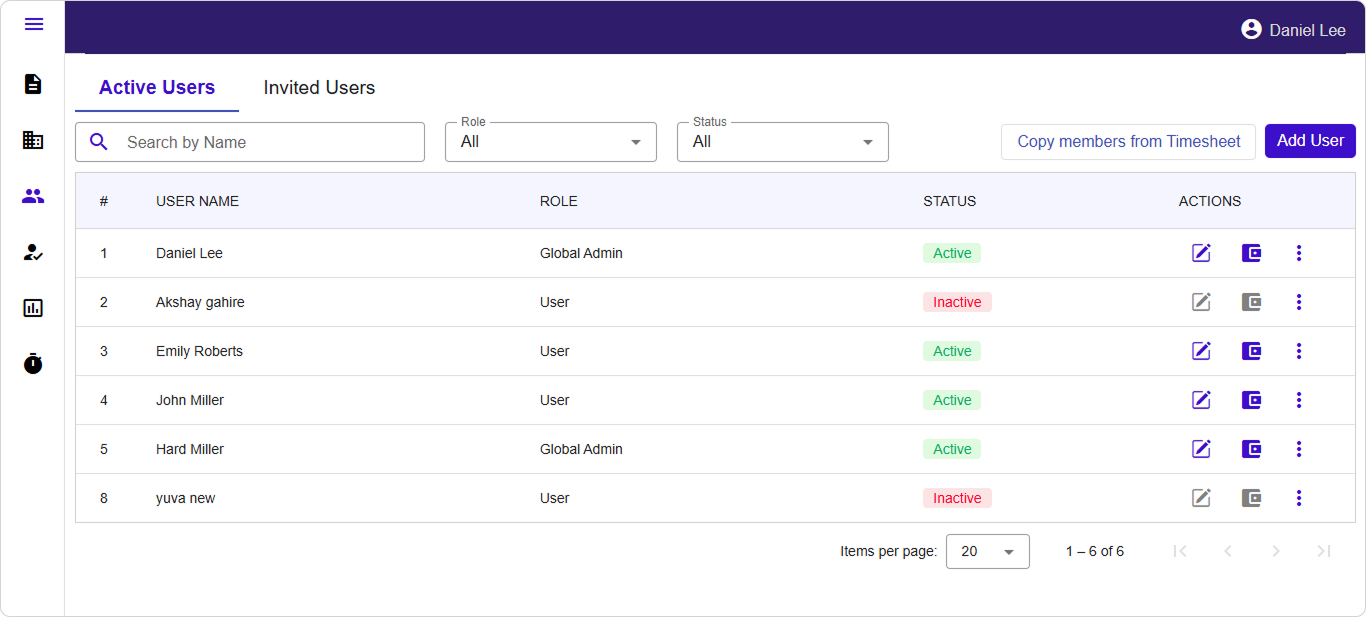
User List Overview
The User Management dashboard provides a comprehensive view of all system users with the following information:
- User name
- User role and permission level
- Account status (Active/Inactive)
- Actions available (Edit, Deactivate, Reset Password)
Search and Filter Options
Search Functionality:
- Use the search bar to find users by name or email
- Search results update in real-time as you type
Filter Options:
- By Name: Show's the user by name
- By Role: Show's only administrators, managers, or employees
- By Status: View active users, inactive users
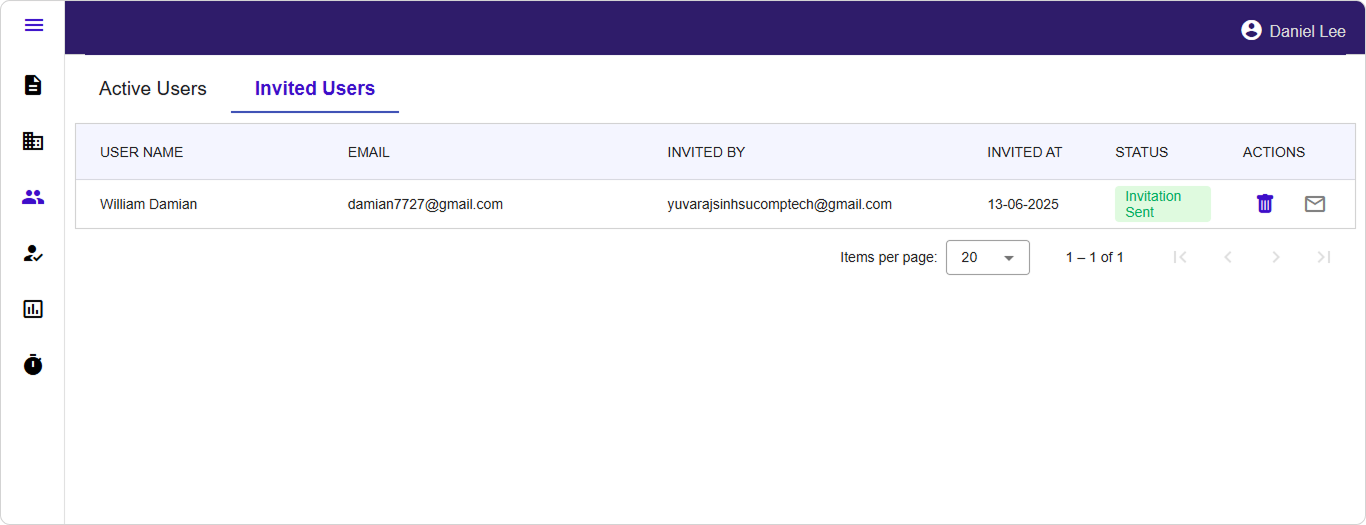
Invited Users:
- The Invited users can be viewed from the Invited user tab
- View the User name, Email, Inviter and the Status of the user
- The actions tab has the delete and the resend invitation options
Editing User
-
Locate the User
- Use search or filters to find the specific user
- Look for the edit icon (✏️) in the Actions column
-
Open Edit Dialog
Click the edit (pencil) icon next to the user's name -
Modify Information
- Editable fields: First Name, Last Name, Role
- Non-editable field: Email (grayed out for existing users)
- Make your changes in the form
-
Save Changes
Click "Save" to update user information
OR
Click "Cancel" to discard changes
Edit Restrictions
- Email addresses cannot be changed for existing users
- Inactive users cannot be edited (edit button will be disabled)
- Some roles may have restrictions on what they can edit
Deactivate & Reactivate User
When to use: When you want to disable a user's access without losing their data.
-
Access Deactivate Option
Click the three-dot menu (⋮) → Select "Deactivate User" -
Confirm Action
- Review the confirmation dialog
- Click "Yes" to confirm deactivation
- Click "No" to cancel
-
Result
- User status changes to "Inactive"
- User cannot log in but data is preserved
- Can be reactivated later if needed
Conclusion
Effective user management is crucial for maintaining a secure and efficient LeaveHub system. This guide provides the foundation for managing user accounts, from initial creation to ongoing maintenance and role management.
Last Updated: September 2024 Version: 1.0 Document Type: End User Guide