Leave Types Configuration Guide
Overview
The Leave Types configuration feature in LeaveHub App allows administrators to define, customize, and manage different types of leaves that employees can apply for within the organization. This comprehensive guide provides step-by-step instructions for setting up and managing leave types to meet your organization's specific policies and requirements.
Key Features
- Create and customize multiple leave types
- Set leave type properties and restrictions
- Configure approval workflows for different leave categories
- Manage leave type availability and permissions
- Set up automatic calculations and balances
Prerequisites
Before configuring leave types, ensure you have:
- Global Administrator access to LeaveHub App
- Understanding of your organization's leave policies
- Knowledge of different employee categories and their leave entitlements
- Access to HR policy documents for reference
Step-by-Step Configuration Process
Step 1: Access Leave Types Management
- Log in to SaralFlow with Golabal Administrator credentials
- Navigate to the LeaveHub
- Click on LeaveHub in the main menu
- Select Leave Types from the side menu
- You will see the Leave Types Configuration interface
Step 2: Create a New Leave Type
- Click the "Add" button
- The Leave Type Creation form page will open
- Fill in the required information
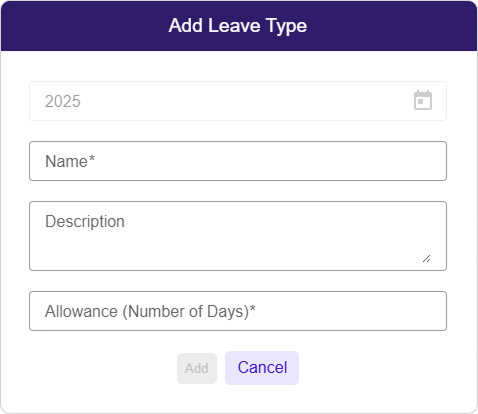
Basic Information
- Leave Type Name: Enter a clear, descriptive name (e.g., "Annual Leave")
- Description: Add detailed description for employee reference
- Allowance: Number of days allocated to the employee/user
Step 3: Setup the Carry Forward Information
- Transfer unused vacation or personal leave days from one year to the next
- Retain earned time off that wasn't used during the previous year
- For detailed information on carry forward, please refer to the Carry Forward Leave Guide.
Step 4: Setup the Leave type Restrictions
- Restrictions for the Leave types are provided
- For detailed information on Leave type Restrictions, please refer to the Leave type Restrictions Guide.
Understanding the Interface
The Leave Types interface provides two viewing options:
Card View - Displays leave types as individual cards - Shows key information in an easy-to-read format
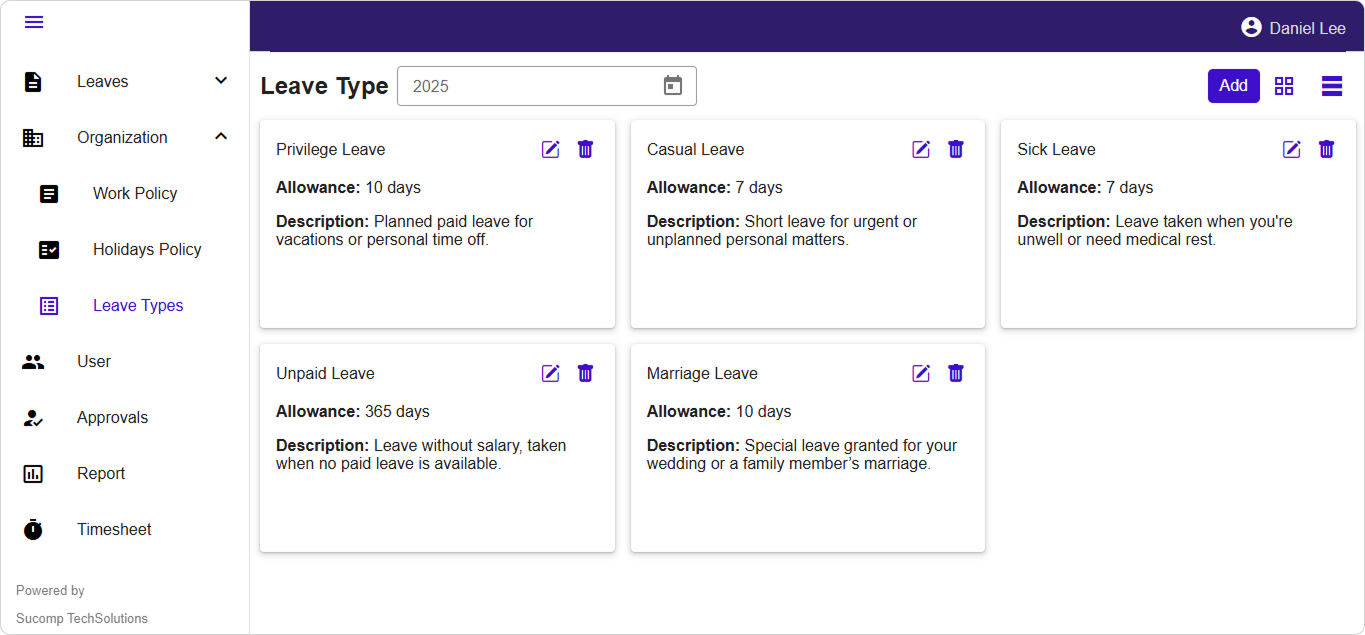
Table View - Displays leave types in a structured table format
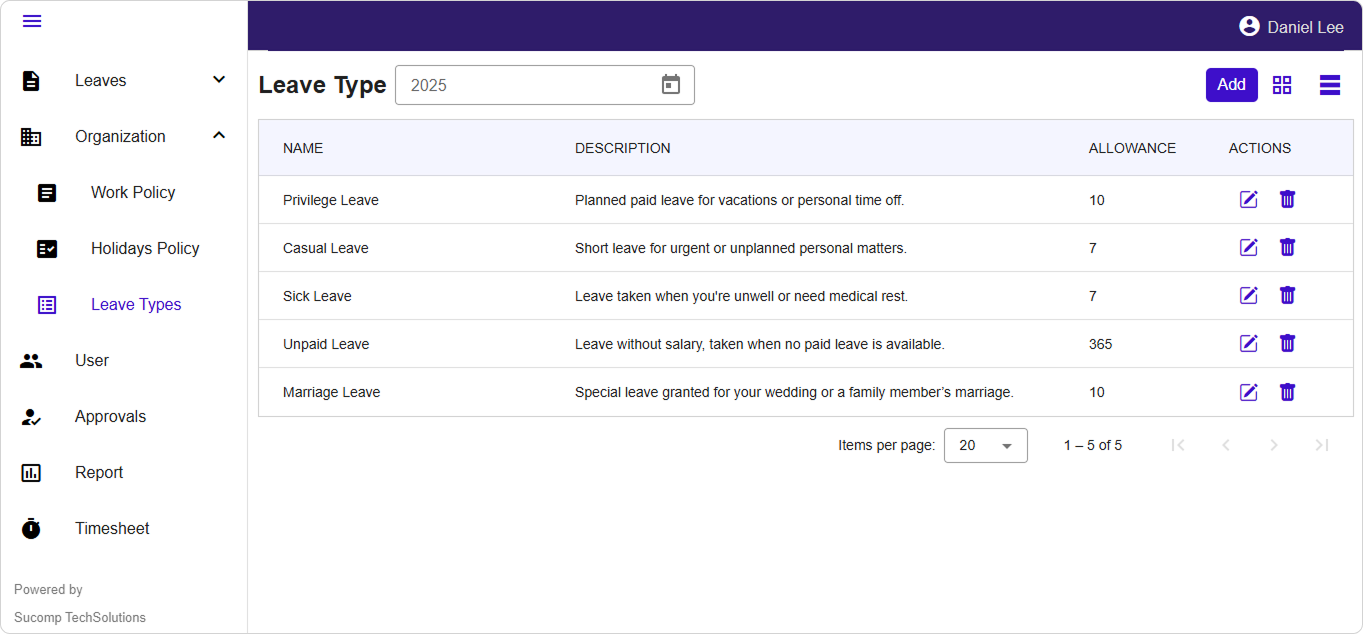
Managing Existing Leave Types
Editing Leave Types
- Navigate to Leave Types page
- Locate the leave type to modify
- Click "Edit" next to the leave type name
- Make necessary changes following the same configuration steps
- Save changes and notify affected users
Copying Leave Types
- Select an existing leave type as template
- Click "Copy" or "Duplicate"
- Modify the copied configuration as needed
- Save as new leave type with different name
Document Information: - Last Updated: September 2024 - Version: 1.0 - Document Type: Administrator Guide